I have a collection of old family photos from the 1920s to the 1980s that I have been meaning to scan and fix for several years now. I had a small bit of success with the Windows software that came with the cheap Canon LiDE 400 scanner I bought in 2023 but always thought it could be better and hated having to do things photo by photo.
Attempts to use both free open source tools and pay-for photo tools required far too much knowledge on my part. Things improved massively over the past 3 years with the arrival of various online AI tools but it was still photo by photo.
The two main challenges with the photos I have are that weird discolouration that happens on cheap 1970s/1980s prints along with the heavy fading of the very old black and white photos.
So last weekend I asked ChatGPT/Codex to build something. I assumed it’d use one of the new AI vision models and a GPU but after a lot of back and forth, something much simpler that runs on any CPU evolved.
The main features the tooling has are:
- You can scan as many photos at a time as will fit in your scanner. It will detect and extract each one separately
- It makes no content changes to the photos. Which also means it’s not a photo repair tool
- It has optimisations for both colour and black and white photos.
- It is tuned to my preferences in terms of agression on the colour. e.g. I’m ok with graininess if the colour is better.
So that’s the pitch. The rest of this post was written by ChatGPT. There is lots of detail if you are interested. But if you want the quick view - just look at the photos themselves.
The colour one in particular blew my mind. That’s me BTW.
The improvements on the black and white photo of my Granny from 1926 is less impactful but still a big jump forward.
Grab the code from the Photo Revival project on GitHub. Only tested on Linux but should work on Windows or Mac. Let me know via a GitHub issue if there are any problems.
All the details from ChatGPT.
Photo Revival is a small tool for that work. Give it a folder of scans and it finds the individual photographs, makes colour or contrast adjustments, and saves an improved copy of each one. It runs on your own computer. After the initial setup, there is no subscription, account or need to send the pictures to an online service.
Two examples show what that means in practice: a faded colour photograph and an older sepia portrait. Only the selected photograph on each sheet is visible below; the others have been heavily blurred for privacy.
Start with a whole sheet
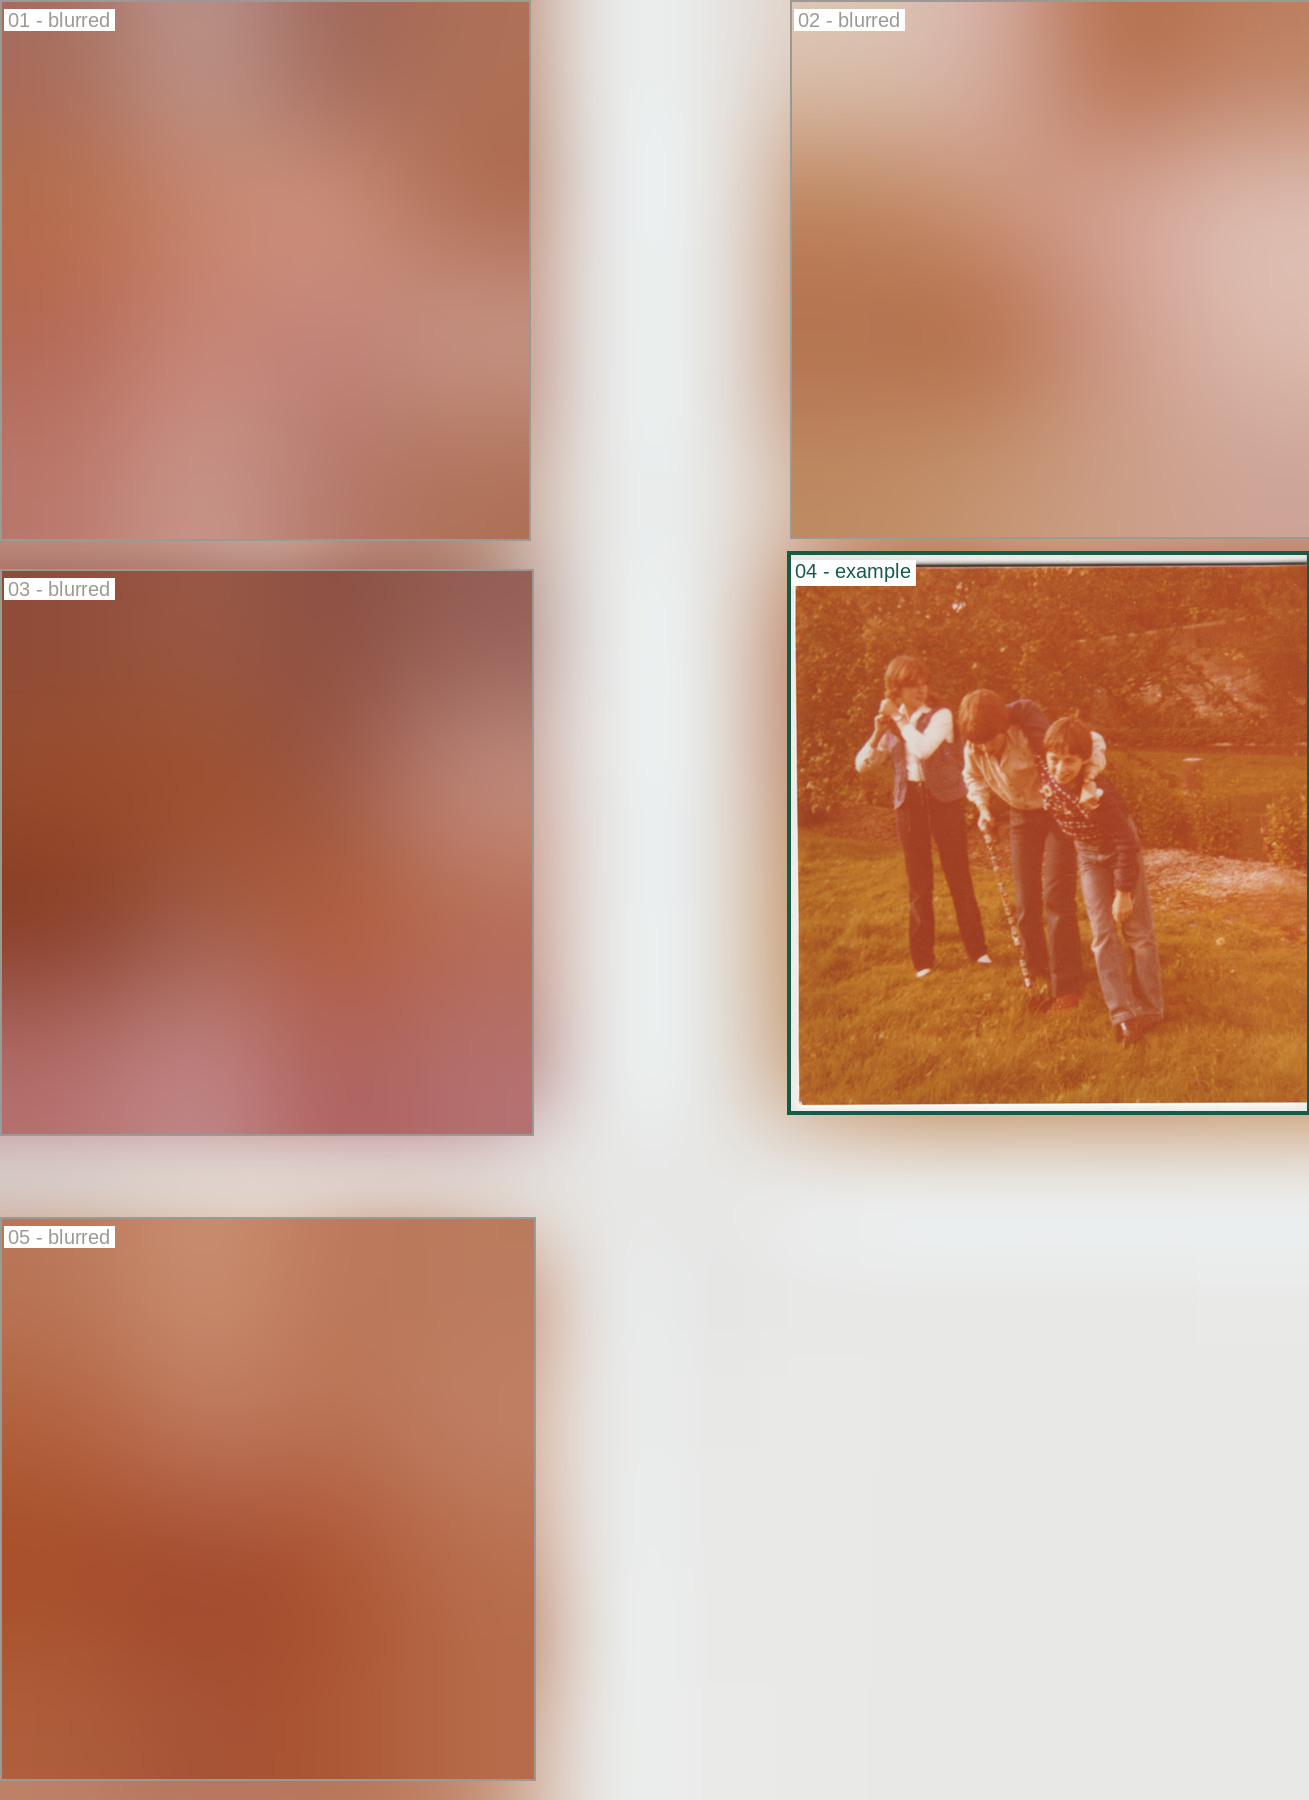
This colour scan contains five photographs. They are not arranged in a perfect grid. The picture we will follow is number 04, on the right: three people in a garden, with a strong orange cast across almost everything.
Scanning several prints at once is convenient. The tedious part usually comes afterwards, when each picture needs cropping and its own adjustments. Here, the software looks for the edges and spaces around the prints and proposes a separate crop for each. It leaves a small margin so the crop is less likely to cut into the picture.
The software detects the boundaries afresh on each sheet, so the next page can have a completely different arrangement and number of photographs. Clear gaps between prints help, though: if two overlap, or an edge disappears into the scanner background, the software can need a little help.
There is a preview mode that shows the proposed boundaries before any enhancement. It is a useful first step with a new batch, and saves finding out later that two photographs were treated as one.
Give each photograph its own correction
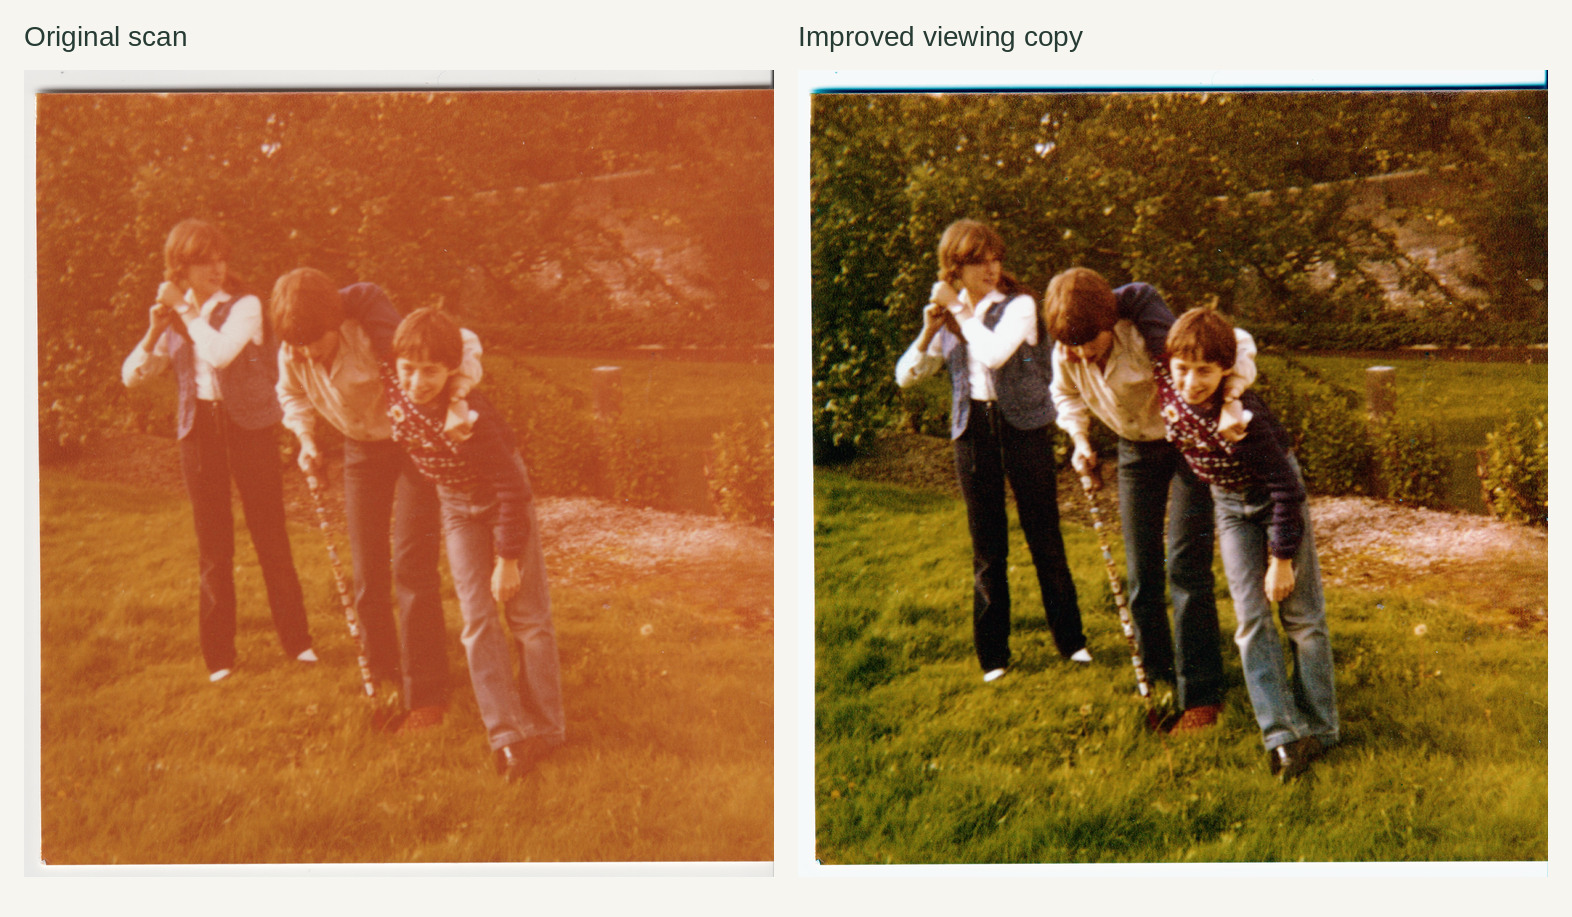
On the left is the original crop. On the right is the improved viewing copy. The orange veil is reduced, the light shirts look closer to neutral, and the trousers and grass have more distinct colours.
The photograph is still soft and grainy. That is part of what the scan contains. The aim is to make it easier to see and enjoy without replacing the people with an algorithm’s idea of what they ought to look like.
There is a small learned model involved in the colour treatment, but its job is to help choose a colour adjustment. It does not draw new eyes, teeth or facial features. Brightness, skin colour and contrast can still change, so it is worth looking at faces closely when judging a result.
The default treatment was chosen to give colour more depth without pushing every photograph to the strongest setting. A stronger option is available, but more saturation is not always an improvement. There is no surviving colour chart in this scene: the result is a plausible correction, not proof of the exact colours on the day.
The older portrait needs a different approach
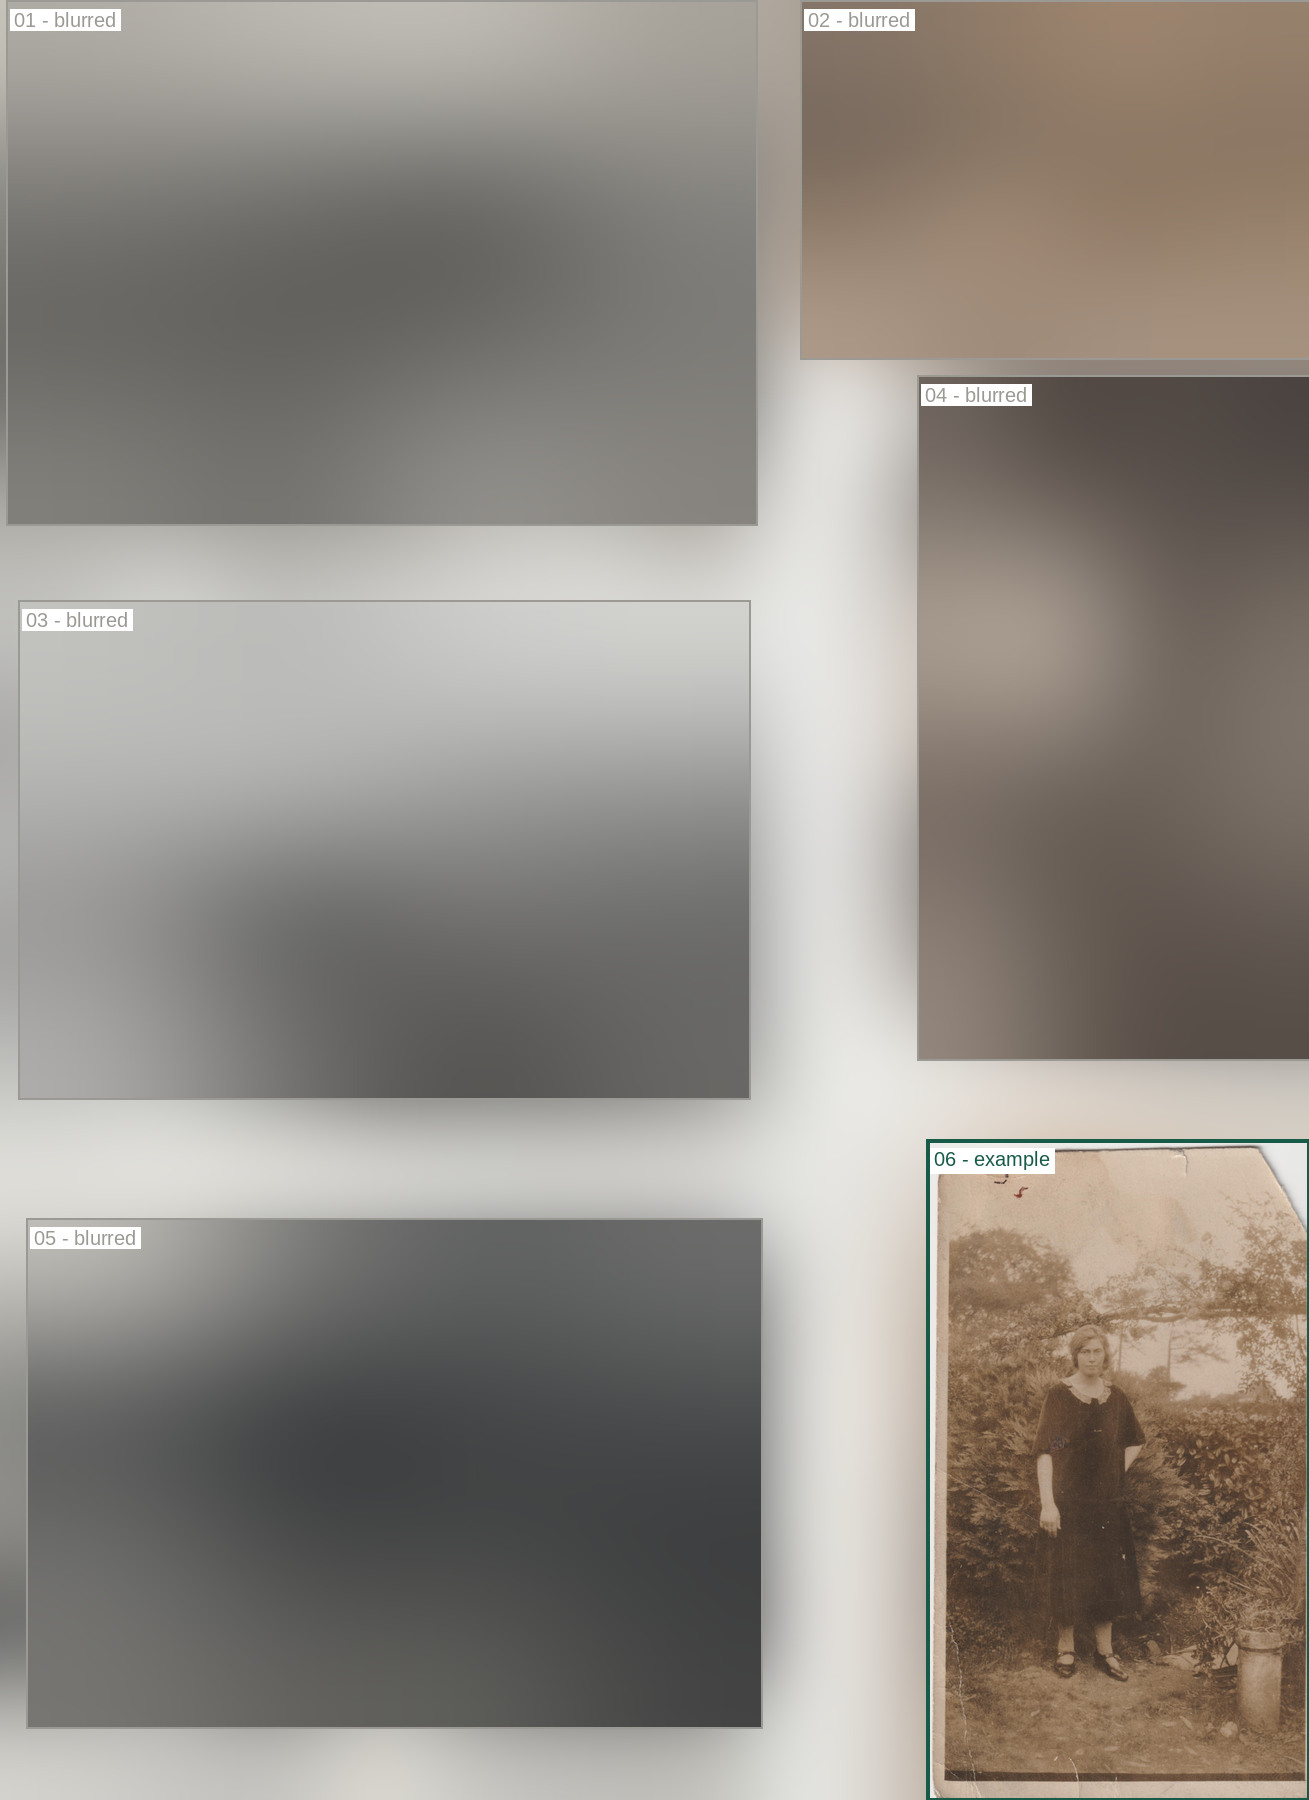
The second sheet contains six prints, including this tall portrait at the bottom right. It has a warm sepia tint, weak contrast and visible damage to the paper.
For this photograph, richer colour is not the goal. The useful change is a clearer range from light to dark, with more separation between neighbouring tones. The treatment keeps the warm character of the print rather than automatically making every old portrait neutral grey.
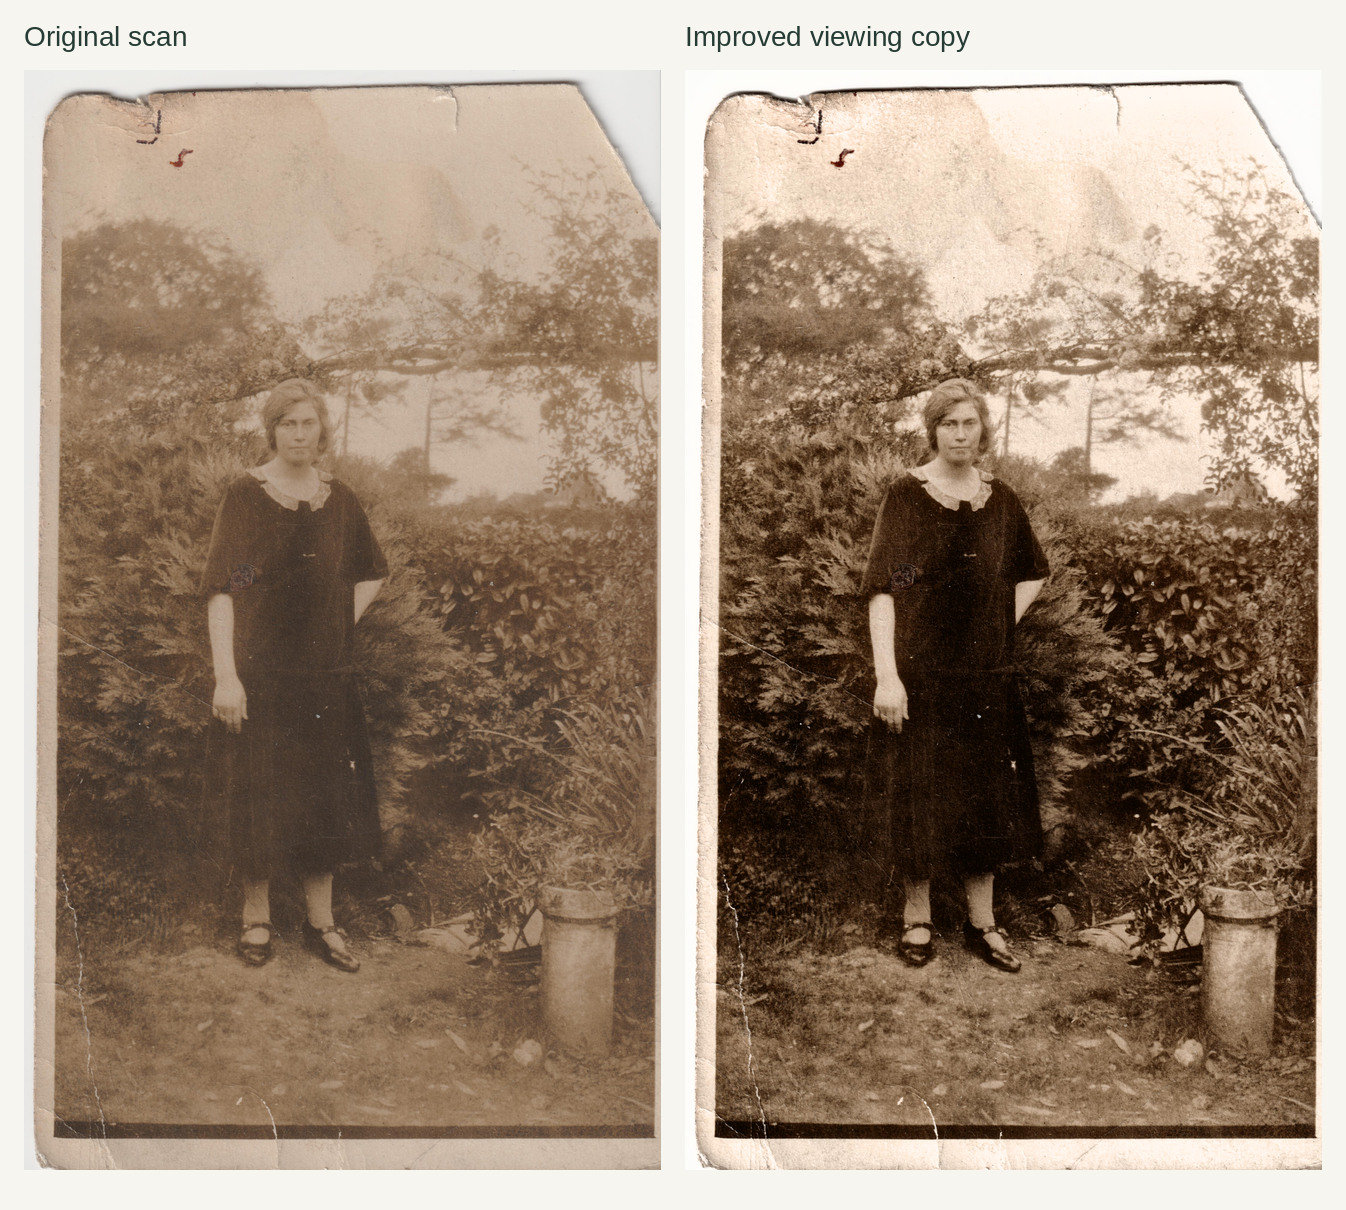
The dress has more depth and the figure stands out more clearly from the plants. The marks and damaged edges remain. The software has improved the tones already present, rather than pretending to recover missing pieces of the photograph.
Extra contrast can also make grain and scratches more noticeable. For badly cracked prints, there is a gentler option that adjusts the overall tones without adding local contrast. It is a useful choice when the damage starts competing with the subject.
Keep the originals and get separate copies
A finished run gives you individual JPEGs for everyday viewing and PNG versions that avoid another round of lossy compression. It also produces a simple page you can open in a browser to compare each original crop with its improved version.
The original scan files stay untouched. That matters because preferences change, software improves, and a future attempt may work better. An improved viewing copy should not become the only copy you keep.
The illustrations here have been made smaller for the web. The actual processing retains the resolution of each extracted photograph. The other photographs were blurred only for this article, after the original sheets had been processed.
Trying it yourself
This is currently a command-line tool, so the first setup involves opening a terminal and following a few instructions. The Photo Revival project on GitHub has setup steps for Omarchy, Ubuntu, Apple Silicon Macs and Windows, plus a generated demonstration you can try before using your own pictures.
Once installed, the usual job is one command pointing at a folder. You can preview the crops first, then run the same command without preview-only mode to make the improved copies. Running the tool with no arguments shows examples, and mistakes such as a missing folder or a mistyped option get a helpful explanation.
You do not need a powerful graphics card for the current pipeline. It runs on the CPU. Very large scans do use memory, so start with a small batch and inspect a few results before sending an entire archive through it.
It will not fix every photograph. Serious tears, missing detail, severe blur and uneven fading remain difficult. What it can do is remove much of the repetitive work between a folder of scans and a set of photographs that are easier to browse, share and enjoy.
comments powered by Disqus